
Matchmover tip: obtaining the actual field of view for any lens using a survey solve
The best camera is the one that’s with you Henri Cartier-Bresson
For a long time we have used a great technique at HecticElectric for computing the lens field of view (FOV) values. When you go to film something, you usually record the millimeter values of the focal length of the lenses you use (or “whereabouts” if using zooms instead of primes). This approach, however, is prone to error - because 3D software thinks in terms of abstract field of view angle, not in terms of the combination of the particular focal length + particular sensor/film size.
So we devised a scheme to reliably compute the field of view from shots of specifically chosen and prepped objects, that we call shoeboxes. This yields very accurate FOV values for any lens (including zooms at specific settings) and can be used with any camera/lens combination, including an iPhone.
🧭 I am currently available for contract work. Hire me to help make your Rails app better!
To make an example we are going to compute the actual FOV of our iPhone. Again: this works with any lens/camera combo, but the iPhone or another smartphone is something that you probably have at hand anyway. Note that with a usual on-set situation you would be shooting this reference for every prime lens in the kit and for every reasonable zoom setting.
To begin - there are only two limitations. You will have to make all the pictures either horizontally (landscape) or vertically (portrait). You won’t be able to easily mix and match, unfortunately. I’d go for the landscape orientation, so let’s stick to that.
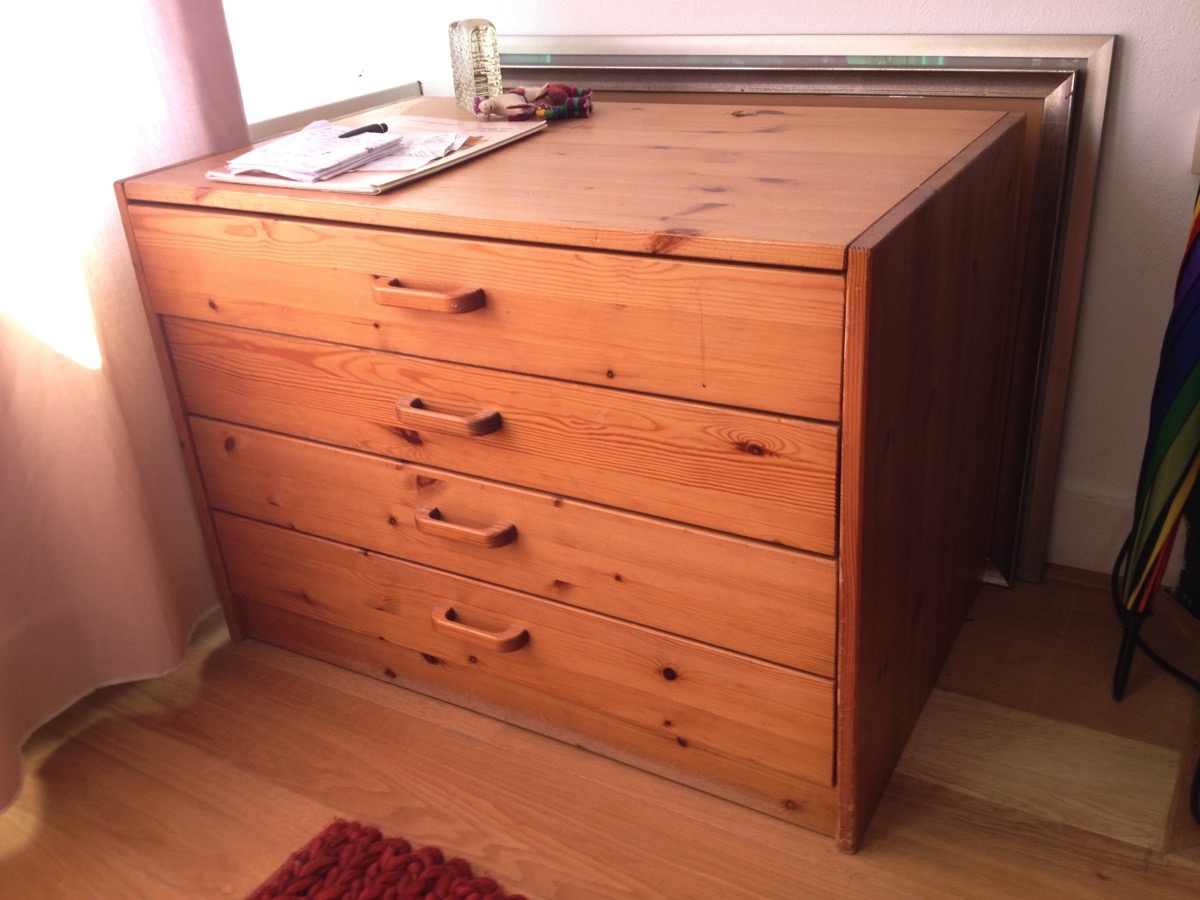
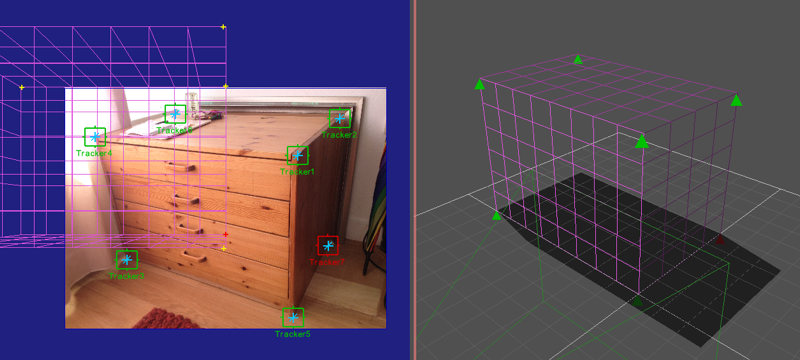
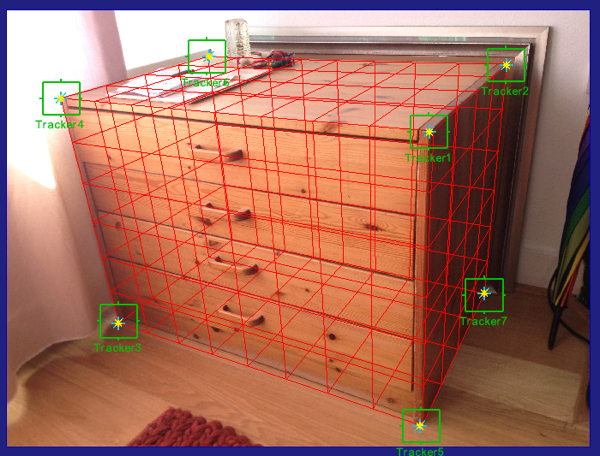
To do good FOV estimation we first need to shoot a shoebox. A shoebox is an arbitrary rectangular volume of known dimensions. What’s important is that you shoot it in such a way that you can see 7 corners of that object. When you are on set a storm-case from some lights or gobos will do fine. Here at home I’ve opted to go for a simple closet.
Here’s how your photo needs to be put together (you can use moving footage, or a few photos - but it’s unlikely you will need more than 3 photos in total).
Note the following properties:
- The shoebox fills the entire frame - this is absolutely crucial. It should really be image-filling but with all the corners still within the frame
- We still see 7 corners of the shoebox volume, they are not obscured by the volume itself or by small objects on it.
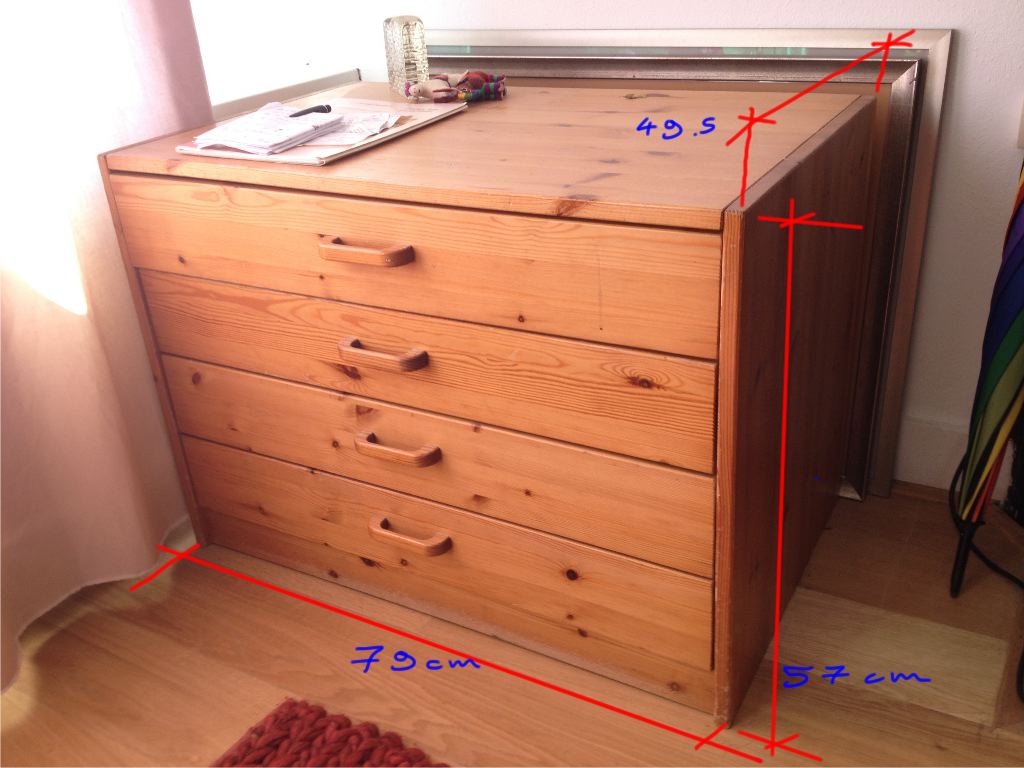
Note that I haven’t cropped the photo in any way. The second thing to do will be measuring that closet. Mind you - this whole procedure will only be performed once.
Take your tape measure and apply the measurement. I’ve arrived at the following units:
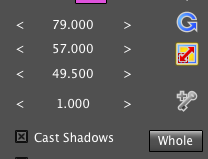
Now, off to estimate the lens. First we load our photo into Syntheyes. Next, go to the Quad view and create a box. Then scale the box to match your measurements.
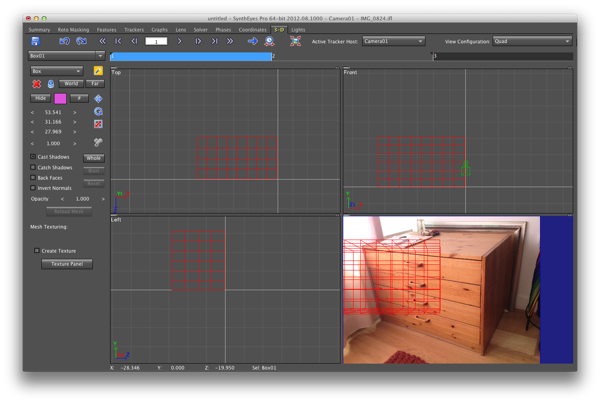
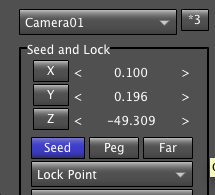
Then in Quad+Perspective mode, Orbit your camera so that the angle matches the actual photo - do it approximately. Now, create and lock trackers on all of the visible corners in the Camera pane, and Place them in the pers view. Set them all to Lock point and Seed. Make sure that they are all placed properly.
Again, make sure that after placement they are all constrained and seeds.
Once this is done, head to the Lens panel and enable distortion estimation.
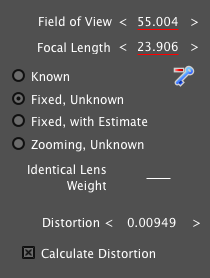
Then, in the Solver panel, hit From Seed Points and enable Constrain. Solve the shot. As a result your camera will be lined up to your box. Now the Lens panel contains the exact lens FOV parameter and distortion. You can compute the distortion in a more accurate way, using the automatic lens calibration based on an auto-grid - but I leave it up to you to figure out the workflow for that.
Now we have the exact horizontal FOV of our iPhone in landscape mode and we can use that to do our photogrammetry. For example, if you shoot photo reference with your iPhone you will always know which FOV to apply when modeling off of that.
This technique has been used many times with great results, and you do not have to schlepp anything to the set to use it - just grab the nearby storm case.
Enjoy!